Description
Use Streamer.bot to control Spotify.
OBS WS v5.x
Tutorial
In order to get full functionality like song request [command !sr ] to add song to song queue , you MUST be premium spotify user. it’s not only because not being premium will cast ads too, but it’s also spotify API limitation.
Open your desktop application during the process so it will be recognized by Streamer.bot on the first connection.
! ► If you already have the first version , remove all Actions and Commands before updating to avoid conflicts◄
Import Files
tinySpot (44.5 KB)
rolySpot (48.7 KB)
Installation
Spotify Dashboard
To control your Spotify desktop application from Streamer.bot, you will need to create a developer account by using your actual Spotify account to get client Id & client Secret codes that are required to get access token from OAuth protocol.
Go to Dashboard | Spotify for Developers to Log in.
Accept Terms Of Service, then create an application, give it a name and a short description, tick the terms of service agreement and click on Create.
Under your Application Name, you will see Client Id followed by a bunch of characters, copy-pasta on a text file you will need it later on Streamer.bot. Now Click on " Show Client Secret " and copy it too.
On the right side , click on the " edit Settings " green button, under the line “Redirect URIs” you will have to add http://127.0.0.1:1300/spotifyOAuthRedirectUri/ , press Save.
OBS Scene Importation
There is now 2 different Overlay which needs different OBS’s Plugins.
Choose one of them to get the file needed to import and create the scene with all elements.
Using Source Copy Plugin, go to Tools tab in OBS, source copy > load scene , find the location of the json file that you downloaded.
tiny SPOT TO SB

tiny Spot Assets (3.1 KB)
4 plugins are needed :
| Plug-in Name | Sources Requiring | Link |
|---|---|---|
Move Transition |
[NS] SPOTIFY scene [CS] 1stHalf-progressBar [CS] 2ndHalf-progressBar |
Move | OBS Forums |
Win Capture Audio |
[ACS] Audio Capture Check the properties for [ACS] Audio Capture and set it to be listening to your active spotify.exe window. |
win-capture-audio | OBS Forums |
Stream FX for 3d Transform |
[CS] 1stHalf-progressBar [CS] 2ndHalf-progressBar |
Releases · Xaymar/obs-StreamFX · GitHub (tested on 0.12.0a117 ) |
WaveForm |
Waveform Visualizer 4 Check properties of this source to make sure it listen to the Audio Capture source. |
Waveform | OBS Forums |
roly SPOT TO SB

roly Spot Assets (3.7 KB)
7 plugins are needed :
| Plug-in Name | Sources Requiring | Link |
|---|---|---|
Move Transition |
[NS] SPOTIFY - 2 1st-progressBar 2nd-progressBar 3rd-progressBar 4th-progressBar |
Move | OBS Forums |
Shader-Filter |
for rounded-rect.shader on BACKGROUND SPOTIFY blend_opacity.shader on Waveform Visualizer |
Releases · Oncorporation/obs-shaderfilter · GitHub (Tutorial to get it : https://www.youtube.com/watch?v=qHUfQ37E_rc) |
Stream FX for 3D Transform |
1st-progressBar 2nd-progressBar 3rd-progressBar 4th-progressBar |
Non-Free - StreamFX (for OBS® Studio) | OBS Forums |
Win Capture Audio |
win-capture-audio | OBS Forums The following plugin is a audio source capture, if you have another plugin to capture the audio source from the Spotify Desktop App it will works too , you will just need to set sources to listen to this plugin instead of Win-Capture-Audio |
|
Recursion Effect |
Waveform Visualizer | Recursion Effect | OBS Forums You probably will need to refresh the value Offset X for this filter, to do so, open the filter, click on it, change the Offset X value then reset it to 7.00 |
Scale To Sound |
BACKGROUND SPOTIFY | Scale To Sound | OBS Forums You probably will need to set the Audio Source to [ACS] Capture audio , or your Audio capture source solution, if you don’t see the frame moving when playing music this need to be done |
WaveForm |
Waveform Visualizer 2 Waveform Visualizer |
Waveform | OBS Forums Check properties of both sources to make sure it listen to the Audio Capture source. |
Streamer.bot
Download the Import File.
Open the Import Dialog by pressing Import from the top right.
Drag the downloaded .sb file into the Import String then press Import
You will Import 12 Actions and 10 Commands.
On 0.1.12 version Commands are disabled by default on importation, you will need to enable only the !spotifyConnect command from the Commands tab.
Now return to the Actions tab, and click on the “tiny/roly SPOT TO SB - !SpotifyConnect [ OAuth + Get Device ]” Action, in the Sub-Actions field you will have to Enter 4 information.
► Set Argument for websocket 5.x connection number ( usually 0 or 1 )
► Set Argument for Spotify Client Secret
► Set Argument for Spotify Client Id
► Set Argument for Crossfade Timing ( if you don’t use crossfade from desktop application keep the value to 0 )
All C# codes should already have their .dll files, they all need mscorlib.dll & System.dll except
the Execute code : [ SERVER ] OAuth Link that also need System.web.dll.
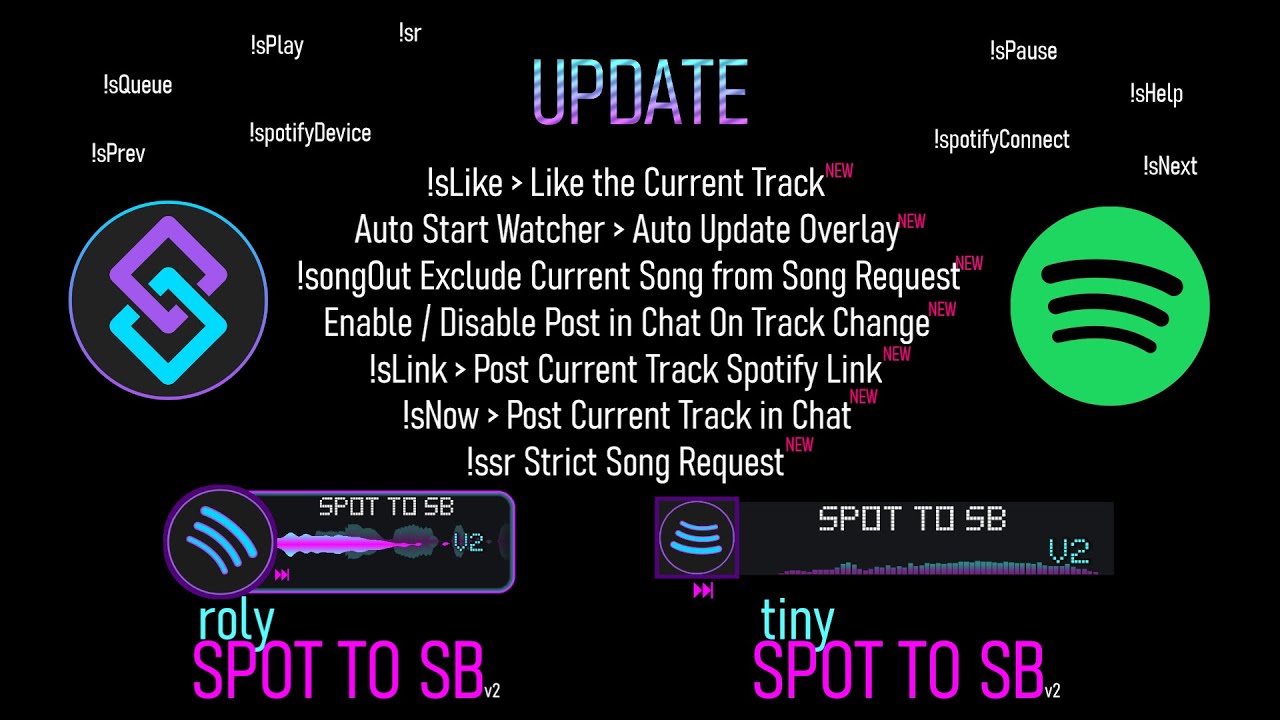
In the command “roly SPOT TO SB - [ Now Playing Watcher]” you can set the argument %watcherToChat% to false to not display the current song on song change. Default value is set to true.
Available Commands
| Command | Purpose |
|---|---|
!sPlay |
play / resume |
!sPause |
Pause the song [ won’t stop the progress bar from the actual method used ] |
!sNext |
Next Song in Queue |
!sPrev |
Previous Song |
!sQueue |
Display in chat the next song that will be played right after the current one. |
!sNow |
Activate the display of current song on songs change " in real time " ( 2/3 seconds of latency ) shouldn’t need to be activated. That Action Start by default on Streamer.bot launch. |
!sr (followed by your query) |
Will add the result to the queue. |
!spotifyDevice |
To set the device to listen if it wasn’t showing up after getting the token. |
| New Commands | |
!sLike |
To Save a song to your Liked songs. |
!sLink |
Let your viewers get the spotify Links. |
!sNow |
Will post to chat the currently playing song ( useful if you choose to not display the song on song change and/or not displaying the overlay ) |
!songOut |
Will exclude the ability to add the currently playing song from song request |
!excludedSongs |
Will display every songs added to the banned song list. |
!songBack |
Followed by the number returned by one of the responses from !excludedSongs |
Configuration
Once one of the two source copy imported ( roly or tiny ) and Streamer.bot Actions imported and filled with client Id / client Secret values, websocket argument set to your currently active connection, you first will have to make sure you Enabled !spotifyConnect command.
A browser page should open to authenticate your account with specific scopes needed. after accepting you will be redirected to the local page you entered previously in the “Edit Settings” section on spotify Dashboard page.
In twitch’s chat, after a short moment it should show Device selected with the name of your computer, this is where the desktop application should be running.
In the case you don’t see a message starting with " default device selected " , you must run !spotifyDevice and this should return all device connected to spotify you use.
Then, Select the Device with !spotifyDevice followed by the number of the Device in previous responses.
Additional information : if you don’t want the name of the current song being updated in the Chat, in the Action " [Now Playing Watcher] you can set the argument “%watcherToChat% to False”.
